Monday, April 26, 2010

Car Washes and Welcomes

This weekend we spent time working outside our house: planting some vegetable and flower seedlings, cleaning our grill area, etc. It was one of those we-want-to-go-swimming-but-it-just-isn’t-quite-warm-enough-yet days. Very thankful for the sun though!

Our girls still got their share of water! Washing the car is a great outlet for family fun, but I always have to be ready to give clear directions as to what area has been soaped and washed or I’m washing it all over again in the end!

 DSCF6342

The kids end up in the “pool” still!

DSCF6343

We also hung up my new welcome sign near our front door. “Bem Vindo” is Portuguese for “Welcome”. There’s a story with this one!

DSCF6321

A few months ago I entered on give-a-way on The Girl Creative blog. It was sponsored by Xpres Urself, maker of custom made boards, vinyl sayings and other unique decor for the home. I commented that I liked the Fancy Monogram Tile. Amazing enough, I got an email saying I’d won! (This is actually the 3rd blog give-a-way I’ve won in the last year—really amazing!) Diana at The Girl Creative got me in touch with Lynette from Xpres Urself.

Lynette was very generous in offering to ship whatever I chose to Portugal. She told me to take my time and let her know exactly what I wanted. After some time, I ended up deciding to offer my prize to a friend who might appreciate it even more. I let Lynette know that I needed more time to let a friend choose what she wanted.

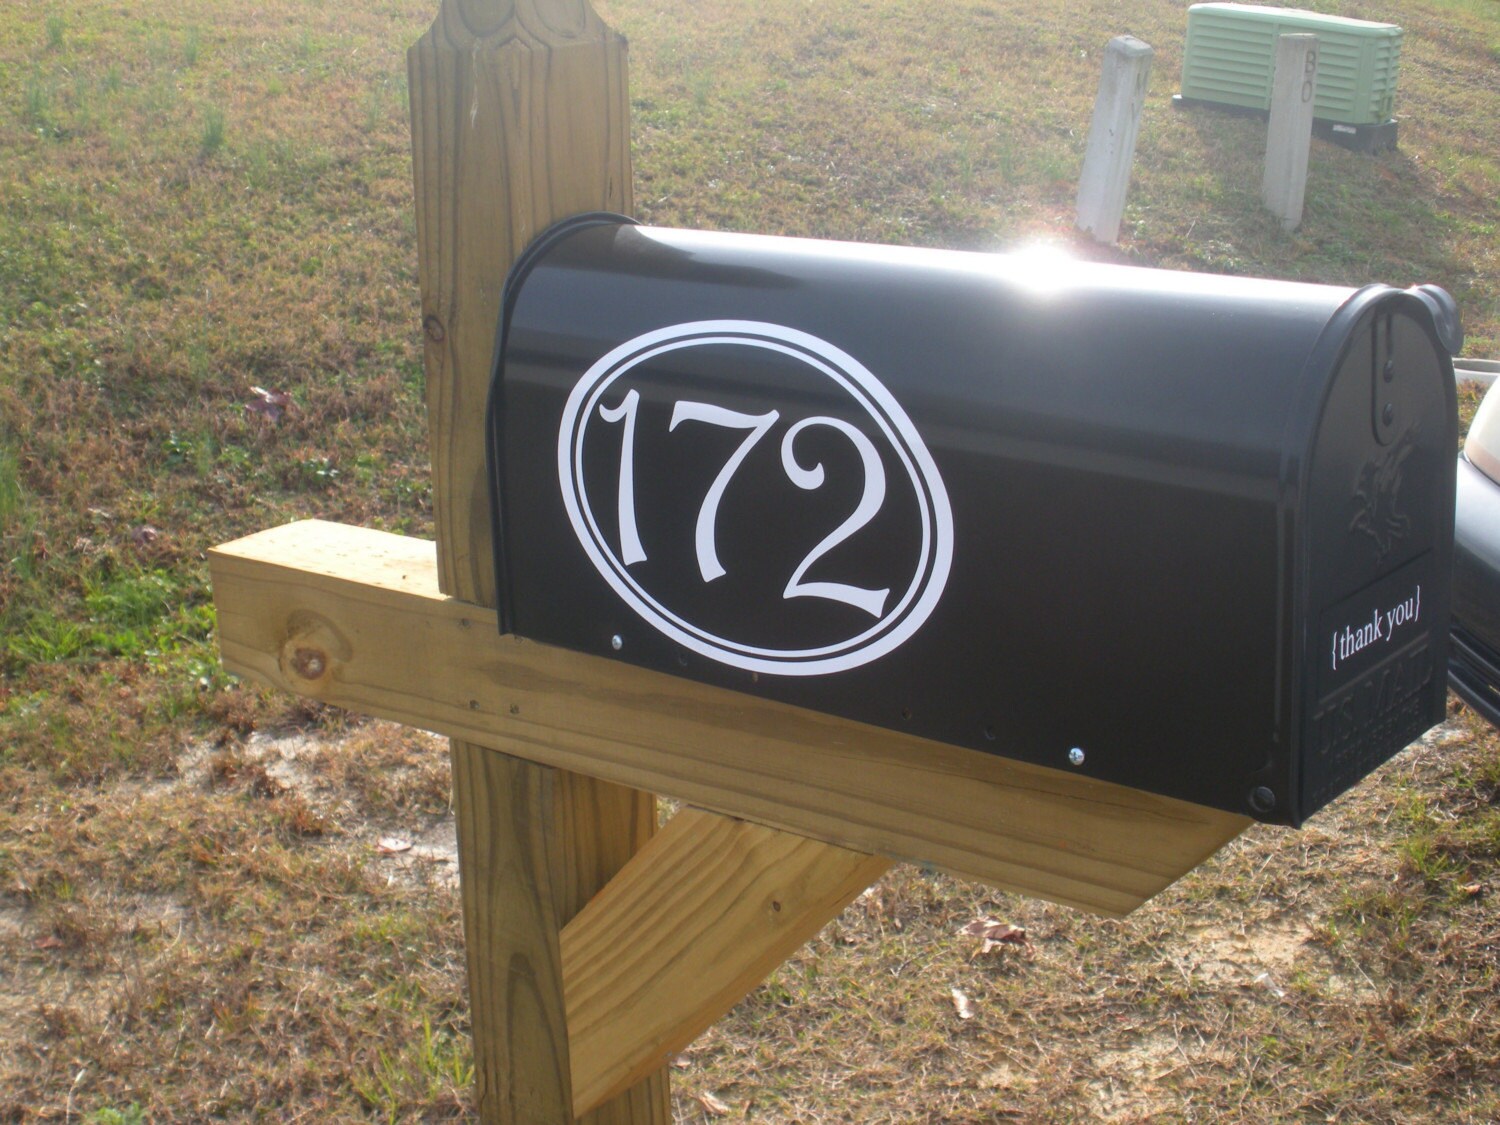
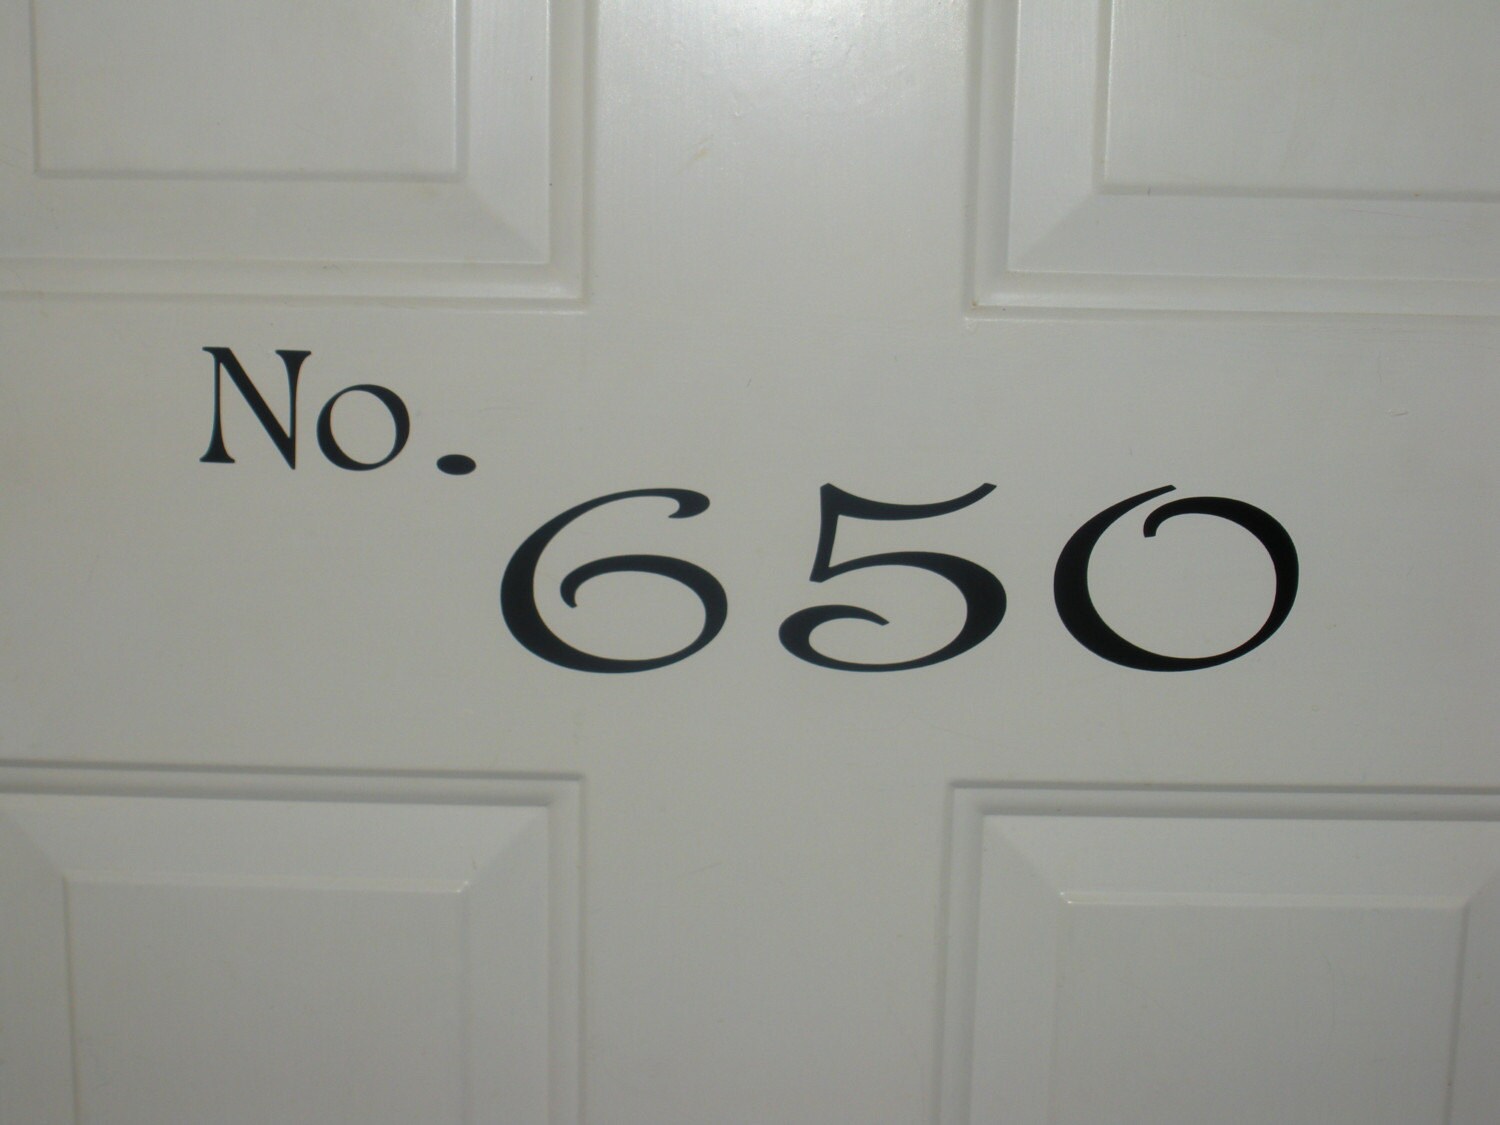
Lynette emailed back that since I was sharing what I won with another that she wanted to give me whatever I wanted also!  So generous!!! My friend and I both chose the Fancy Monogram Tile for ourselves, but there are many other cute and affordable things in her shop, like the Mailbox Monogram or House Address Decal.

Mailbox Monogram

House Address Decal

I wanted to tell everyone about Lynette’s shop and generosity as a big THANK YOU!!! Such a nice treat to spiff up the entry of our home!

DSCF6320

Thursday, April 22, 2010

A Place of Rest—Part 2

Here are the other changes and additions I made to my craft area after finishing the scrapbook paper edged table. See Part 1 for the details on that.

DSCF6217

We covered a ratty old bulletin board with burlap and man, what a simple transformation! Large old buttons hot-glued to flat push pins were an easy addition.  Fun to have a place to put the vintage “Make” flashcard amongst other special things. I have several inspirational ideas or future to-make’s I want to print out and keep before me there as well.

DSCF6184

DSCF6207 

I made the fabric flowers from a tutorial on Tatertots and Jello. The only thing I missed but figured out was to fold your fabric strip in half for a tighter flower. You can see how the middle flower with the wood bead is a little bigger. I love seeing fabrics before me that have a history (fabrics I used for one of my daughters’ crib bumper, pillows when we first got married, and a tag blanket for a friend’s baby plus an old favorite shirt from Banana Republic that’s fit is out of style)!

DSCF6182 DSCF6185 

I also made a fabric flower for one of the cans I covered in fabric I had left from a old quilt topper (I’d used it to make a crib skirt in the past). The other got a chenille rick rack and yo-yo treatment.

DSCF6188

DSCF6208

Next, I hung up two exciting finds: one a vintage baby doll dress from a favorite antique/junk store in America and the other a Portuguese embroidery and cross stitch pattern foldout from 1948. I love the fabric and rick rack of the dress and the bird print of the foldout! I found cheap unfinished frames at our dollar store here and used a dark stain we had on hand. I used card stock behind the dress and velcro to suspend it in the shadow box frame. I didn’t have any card stock big enough for the other frame so I used stiff tissue paper instead.

DSCF6178

DSCF6206

The last quickly transformed addition to the wall was a magnetic chalkboard we’d bought at a Pottery Barn Outlet years ago. It came with magnetic words like “Menu” or “To Do".” I like the industrial look but it needed a bit of femininity to fit on the wall.  First step was to hot glue a line of yo-yo’s I bought on sale at JoAnn’s in the States.  Then I put the “To Do” sign at the top thinking I could use it for my list of things to make and do.

Later I remembered I’d found vintage game pieces that spelled REST. They were too small to replace the “To Do” sign so I printed out my own letters on card stock and inked the edges with a marker. It suddenly became a reminder instead of another list! {Rest is a command I’ve felt from the Lord for years (Hebrews 3-4) , and it has more to do with trust and belief than taking it easy, although the latter is something I can use too!} DSCF6205

Amazingly enough, this change really brought peace to the area. You know that feeling of awe when something comes together? It is such a place I enjoy to be!

DSCF6203

DSCF6218

I’m sharing this at the following “parties”—places to get great ideas!

Frugal Friday at The Shabby Nest

Weekend Wrap-Up Party at Tatertots and Jello

Saturday is Crafty Day at Along for the Ride

Just Something I Whipped Up at The Girl Creative

Craftastic Monday at Sew Can Do

Anti-Procrastination Tuesdays at New Nostalgia

Show and Tell at Blue Cricket Design

Make it Yours Day at My Backyard Eden

Tuesday, April 13, 2010

A Place of Rest--Part 1

If you looked at the mess I had for a craft area a month ago, you’d say it was a far cry from rest. (I call it an “area” because we have our finished attic divided with bookshelves rather than walls apart from the guest room and bath—so one side of my craft area is open for everyone to see.) Not only had I never gotten things truly organized, it got out of control during the process of making and finishing the guest room wall. 

DSCF5903 

The first step in attacking the chaos was finishing my new craft area table.  We bought 2 of the 19.99 Euro EXPEDIT bookcases from IKEA that matched a bigger piece we’d bought a few years back for the “legs” of the table. We used a cheap MDF door for the table top. My husband originally thought I’d paint it, but I liked the MDF color. I would need to put a coat of polyurethane to help it be cleanable. To give it a creative edge literally, I chose some of my favorite scrapbook paper to cover the edge of the door.

DSCF5781 

After cutting the pieces to size, I tore one edge of each paper so the pieces might flow together a little easier. I used decoupage glue (because I had it on hand) to attach the pieces to the door edge. Next, I painted 3-4 layers of polyurethane on the top of the “table” and over the papered edge. Several things I learned:

DSCF5886

1. The glue discolored/kept the polyurethane from “coloring”the table top where I accidently dropped some. You can see this with my first coat of polyurethane, left lower corner of the table…live and learn.

2. I painted the polyurethane in different directions for each coat to attempt to not have the striped look you see above.

DSCF5906

3. Hot glue takes the coating off. That happens with lots of surfaces though right? My fault for not being more careful!

4. The sun from my roof window is fading patterns on the top now from whatever sits on it.  Not sure what I could do differently for that—get a window shade?

DSCF6210

5. The door on top of the bookshelves made the table a little too tall for the chair I had been using. Thankfully we found a cheap matching office chair that raised a bit higher.

DSCF5907

DSCF6218 

Despite all this I’m really pleased with the table and the cleaner look of my craft area.  I’ve spent my time since getting the wall decorated and organizing the other sides you don’t see. I’ll save the details for part 2 next week!

DSCF6217

I’m sharing this at the following parties:

Just Something I Whipped Up at The Girl Creative

Anti-Procrastination Tuesdays at New Nostalgia

Show and Tell at Blue Cricket Design

Make it Yours Day at My Backyard Eden

Miss Mustard Seed’s Furniture Feature Friday

Frugal Friday at The Shabby Nest

Weekend Wrap-Up Party at Tatertots and Jello

Thursday, April 8, 2010

Amazing Places

This last month we visited some amazing places during our friend Jen’s visit. These are some of my favorites.  

We visited Belem (the Monument to the Discoveries and the Praca do Imperio in front of the Mosteiro dos Jeronimos are just a few have-to-see’s there), the Palacio da Pena in Sintra, and the most western point of Europe in Peniche. You’ll have to come see for yourself!

Wednesday, April 7, 2010

Recycle the Shells

Easter egg shells that is. I am a keeper at heart. It is hard to throw out beautifully decorated eggs! Last year I decided to keep some of the prettiest shells for a rainy day. Thankfully that “rainy day” came (albeit a sunny one!) and the girls used the egg shell pieces to make mosaic art as an Easter project.

DSCF6171

My oldest wanted to draw her own picture to glue the shells on, but ended up deciding it was easiest to make a basic shape (rather than a stick figure man!). The small pieces can be tricky to pick up and glue so I worked along the girls to get the pieces down. I think as they get older I’d like to separate egg shell colors so more detailed designs can be attempted.

DSCF6170

A fun coincidence--the day after we made our mosaic crosses, we went on a family adventure which included visiting some Roman ruins in our area of Portugal. We had heard the site showed how the Romans had below-floor heating, but I didn’t know we would get to see these:

DSCF6122 DSCF6121

It was awesome to get to show the girls how people 100’s of years ago created mosaics for their homes just after we’d made our own. It was also very fitting to discuss who the Romans were just before Easter. The girls awareness of that time period has only been from Bible stories of Jesus’ life under Roman rule. Hopefully it brought a little more reality to the Truth they know!

For an amazing list of other egg shell uses, see The Grocery Cart Challenge. I’m sharing this at Works for Me Wednesday and

Photobucket

Monday, April 5, 2010

Favorite Finds Finally Get Used

I bought a bag of felt flowers from one of my favorite antique/junk stores over 6 years ago. Someone had put so much work into adding sequins to several of the flowers. You could tell from the sequin package in the bag that this was a really old project that never got finished! Once I planned to use them to decorate a pillow in a white and beige room we had in our old house. Now I’m glad I waited—I needed something special to renew a worn out lampshade in our guest room.
DSCF5838
I first covered the shade with some pink fabric. Then I decided to use some antique buttons and beads as the flower centers to help blend the flowers in with pink fabric and the other tones in the room. I attempted to sew the beads and buttons with the flowers onto the shade but quickly resorted to a glue gun.
DSCF5925DSCF5913
I’m sharing this at the following parties:
The Girl Creative


Show and Tell Green

Friday, April 2, 2010

Center of Attention

It strikes me a bit that you do not see many Easter decorations here or Easter baskets and colored eggs for that matter. My hope is that means Jesus is kept the center of attention this holiday! We do enjoy putting out our Easter decorations from America and Germany still, doing egg hunts and the like. However, I thought this year I would try to create a centerpiece for our table with a different focus. I added the symbolism that came to mind with each item in parentheses.

DSCF5796

Candy and chocolate covered almonds are one thing you find in mass during this season in Portugal—a great thing to fill a sugar and creamer (Jesus is the sweetness in our lives)! I had bought the quail eggs in Germany (New life is given). The candles are from home (Light shines in the darkness). I had never figured out what to do with the postcard before--it’s postmarked 1914 (the glory of the cross). I also thought the lamb basket my daughter made in German kindergarten last year was appropriate with the theme (humility and simplicity).

“Behold the Lamb of God, which taketh away the sin of the world.” John 1:29

DSCF5798 

PS: If you’re looking for another great idea to incorporate the true meaning of Easter, my friend Emily wrote about creating a Resurrection Garden—a beautiful project for kids and adults together! Maybe we’ll try that next year!

I’m sharing this at Frugal Friday on The Shabby Nest

LinkWithin

Related Posts Plugin for WordPress, Blogger...