Sunday, January 22, 2012

January Blooms

Portugal is chilly {especially in the shade or inside!}, but not cold enough to kill the beauty that abounds. So fun to pay attention to what’s blooming around our house!

IMG_0713

IMG_0715

IMG_0718

IMG_0726

IMG_0727

IMG_0729

Even the strawberries keep coming. Need to catch them before the birds do.

Linking up to:

Photobucket

Thursday, January 19, 2012

“Custom” Dining Room Chairs

This isn’t my first post about our dining room chairs. They’ve been one of those seemingly expensive projects we’ve ignored for a LONG time. We’ve been content with the mix-match group we had, yet for dinners where we had a lot of people who sat in those chairs for a long time, I felt bad for them! In light of the fact that our job is hospitality, we decided this would be the next project to tackle when money became available.

Last fall we found some cushioned faux-leather-but-you-can’t-tell chairs we loved on sale! We had to wait until February for them to come in, yet in December we got a call that the manufacturer was not going to make more. We got our money back and started looking again. We went to several different places in Lisbon hoping we could find a decent alternative. I did find out that custom upholstered chairs are expensive in big furniture stores and mom-and-pop shops the same. IKEA had a sale on their chairs at the time, and I have always liked the INGOLF chair:

INGOLF Chair, brown-black Width: 16 7/8 " Depth: 20 1/2 " Height: 35 7/8 " Seat width: 16 1/8 " Seat depth: 15 " Seat height: 17 3/8 "  Width: 43 cm Depth: 52 cm Height: 91 cm Seat width: 41 cm Seat depth: 38 cm Seat height: 44 cm

My husband wanted to get these chairs and add a padded seat of our own {?}. We had seen some great outdoor fabrics so this sounded like a possibility. I agreed to it when he said we could ask our local upholstery man to pad the chairs for us…for the right price. This was something I didn’t want to mess up! Guess how much the man said it would be:  10Euros per chair—unbelievably good!

IMG_0659

What do you think? We are VERY pleased! My husband got to see the fellow carve out the foam to fit the chairs perfectly. They are as comfortable as we hoped! The fabric is a linen-look wipe-able outdoor fabric. Perfect for all our projects at this table and meals with kids!

IMG_0662

You might can see the end chairs are not the same {two of the matching mismatch set!}. We hope to find something unique for the ends…someday.  For now we are happy with such a welcome change!

Monday, January 16, 2012

Winter Wreath

IMG_0709

So you probably can guess what I made this wreath out of! I had seen a tutorial for a wreath made from cute striped socks, so I thought I’d raid our stash of less than optimal socks! The girls contributed tights that itch them, and I had two pairs with holes.

IMG_0699

I remembered to take the photo after I’d already started cutting! Once your socks are cut, you slip them on a styrofoam wreath form you’ve made a slit all the way through.

IMG_0700

Once I had the wreath covered, I cut out the “Brrr!” with my Silhouette and attached the vinyl to a piece of lightweight hard plastic I had cut to fit the back of the wreath.

IMG_0703

I hot glued the edges of the plastic to the back of the wreath. Next, I added a felt snowflake I had from a gift box with a button of sorts with a nail-like shank. It feels great when I can use things I’ve held onto for projects like this!

IMG_0707

I decided to use a wire hanger attached with straight pins and strengthened with hot glue. We have to use these big power suction cups to hang wreaths on our glass front door panel since a wreath hanger won’t fit {but I am thankful for that glass so I won’t complain!}.

IMG_0705

Happy winter everyone from sunny but chilly Portugal!

Linking up to these parties:

Todays Creative Blogall crafts Homemade Projects ~ Add Yours! {1/17}

Wednesday, December 21, 2011

Parcels, Cards and Luminaires

IMG_0446

We’ve learned a few fun new crafts and games this December that I thought were worth sharing!

IMG_0338

At our neighborhood Christmas party, the kids played Pass the Parcel led by our British neighbors. I’m not sure if I’m the only one who didn’t know about this game or if it is truly a British game per Wikipedia. Anyway, it’s similar to Musical Chairs but a wrapped package is passed while music plays. When the music stops, the child holding the package unwraps one layer of the wrapping.

IMG_0340

Our neighbor so kindly put a small chocolate Santa in each layer so everyone got several chocolates since there were at least 10 layers! Finally the child holding the package for the last layer of wrapping paper gets to keep the gift. Then she brought out gifts for each child—so diplomatic and thoughtful!

At the other party we got to attend, the kids did a bunch of fun crafts. Thanks Cristi and Kim {waiting for the yarn hat tutorial on her blog}!

IMG_0398

I added to the mix with a craft I based on a Christmas lanterns tutorial from Our Best Bites. I had a bunch of dessert jars I couldn’t bear to throw away yet which I thought could be a small version of their project. The kids cut up small pieces of tissue paper and glued on with a half water/half glue solution. Some of the candle holders looked more Christmas-y than others which is great either way.

IMG_0397

The kids got busy with other things before they could have added ribbon and glitter snowmen or trees we had to the outside, but I still think they turned out really cute—and talk about a cheap craft!

IMG_0447

IMG_0352

We also tackled a few homemade cards for neighbors and local friends this year. Styled after one from Meet the Dubiens' blog, I drew a “cord” for the girls to add finger stamped light bulbs to. Inside I glued on little tags that said “All is calm, All is bright.” Imperfectly perfect?!

IMG_0449

One last thing I had to share was one of the “gifts” the girls have put together for another {they ran around the house and put some items together for a “new” gift}. I love the wrapping on this one under the tree—it says “I love you Miah”! Sweetest ever!!!

IMG_0386


Saturday, December 3, 2011

Thanksgiving 2011

DSC_0020-1 (2)

Before I’m way past Thanksgiving, I thought I better share about how it went, even if it’s just me for to check next year when I’m recalling what worked or didn’t!

IMG_0300

Food wise {for what I made for this meal}:

  • For the turkey, I used Pioneer Woman’s Favorite Turkey Brine again since Butterball’s are not an option here. I think it helps a fresh turkey {the butcher made sure I knew it had been killed the morning I picked it up!}.
  • I made Make Ahead Gravy again from Southern Living. I was a little sad to not put all the good drippings from the turkey to use after I’d already made the other though—but having it already made is so nice!
  • My green bean casserole was much better than last year’s because I boiled the frozen green beans before adding them to the casserole to bake. I didn’t have that problem in America with canned green beans {difficult to find here}.
  • I need to use jello mixes from the same country! One from Germany and one from the US did not make for a solidified jello salad. Funny my kids and husband still ate it though!
  • Keep an eye on the rolls to not let them get TOO brown!
  • Pureeing frozen pumpkin with a little condensed milk helped it get to the right consistency faster. It worked fine in All Recipe’s Perfect Pumpkin Pie instead of canned pumpkin.

DSC_0019-1 (2)

Last year’s napkin holders were still in good shape, and I liked how they looked with my “new” table runner and napkins turned placemats from the flea market.

IMG_0304

DSC_0021-1 (2)

I also found some cheap copper-like cups for small bouquets at the flea market. I decided to let our town florist make the bouquets since it didn’t cost me any more than the price of the flowers. I was OK with them after I pulled out all the greenery I wasn’t fond of. So next year I think I’d choose to cut and arrange the flowers myself.

DSC_0022-1 (2)

So thankful for my friends making wonderful treats in addition to the traditional dessert fare! The best EVER sugar cookies—pretty too!

DSC_0018-1 (2)

The cupcakes were not only tasty but helped make our kids’ table Mayflower boats! Later we let the kids ice the cupcakes.

IMG_0302

The printables came from Shindig Parties To Go. I only made the ships and napkin rings, but they offered much more to make in the free download.

DSC_0024-1 (2)

The kids had a great time icing the cupcakes and doing some coloring and crafts after our meal.

Everything turned out great—truly thankful for a wonderful time!


Monday, November 28, 2011

The Camping Party

IMG_0163

Our oldest daughter wished for a “Playmobile camping” party for her 7 year old birthday. It was really just a camping themed party, no overnighting this time. Playmobile showed up just for the cake {and a few gifts}!

Miah's Invite 001

I looked at invitations on Etsy and Pinterest and decided to make my own with my Silhouette program—I didn’t have to use the cutting machine for this one.  The color on the invitation above is a bit off since I had to scan it {Silhouette doesn’t seem to want to share it with other programs}. I purchased the 2 graphics and pink wood grain background from their online store and found the log font for free. I was able to use these items to make some of the party décor.
IMG_0127

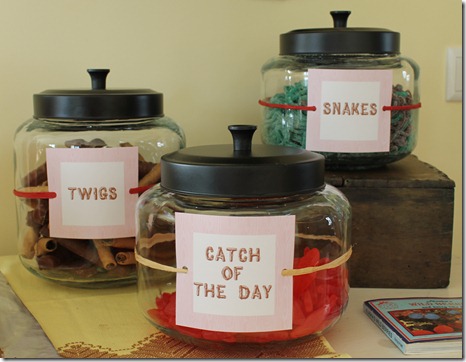
Pinterest was a great place to find ideas for the party! I copied others’ ideas for food:

  • Catch of the Day: Swedish Fish
  • Snakes: gummy strings
  • Twigs: Twix bars and pirouettes
  • Ants on a log: celery with peanut butter and raisins
  • Trail mix: nuts, raisins, and M&M’s
  • Smores {of course!}: we don’t have graham crackers here in Portugal but a cookie that is similar

IMG_0118

Portuguese often have pudding and mousse at parties, so I made a little for some kiddy looking camping coffee.

IMG_0139

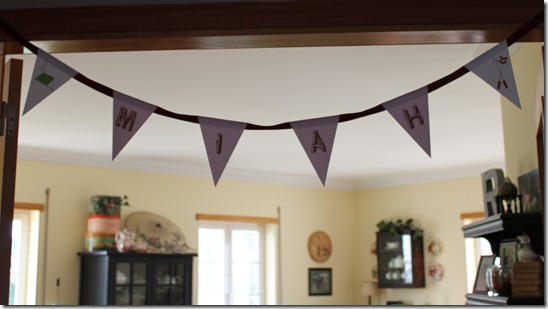
I decorated with some vintage camping thermoses I found, lanterns, some of the girls’ toy binoculars and compasses, a small evergreen tree, some stars I hung over our dining room table, and a pennant banner I made.

IMG_0119

IMG_0133

We didn’t know anyone with a tent to borrow, so we had a very makeshift one for the party {and who knew if the November rains would hold off that day!}.

IMG_0881

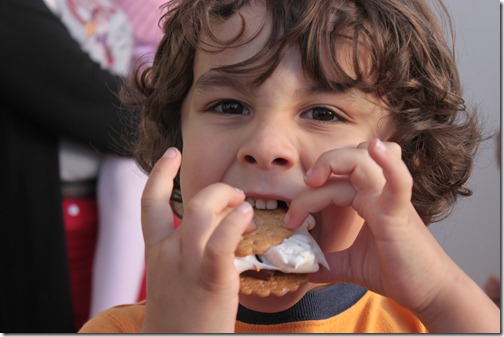
My husband got his new outdoor fire pit made just in time for the party. The American children were more keen on making smores than our Portuguese friends, but everyone enjoyed the roasted hot dogs.

IMG_0887

IMG_0897

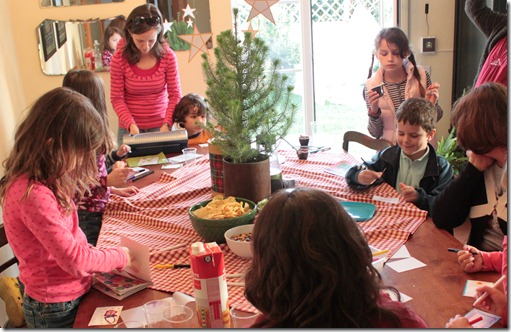
Another hit for all the kids was making laminated nametags—kind of like a luggage tag. We had camping stickers and markers, they decorated them, then I laminated them and added twine through a punched hole.
IMG_0911

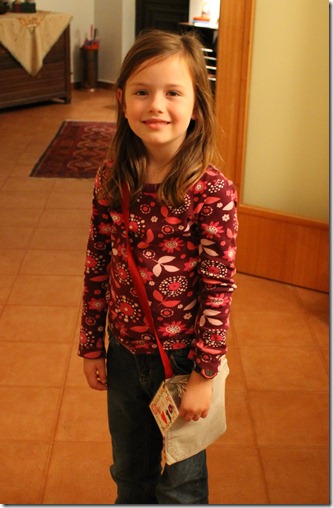
The kids then got to choose a “camping satchel” to put their nametag on. I had collected pockets from my husband’s worn out pants for years, and I finally had a chance to use them! I hope to write a post soon about how I made them {I would have like some instructions!}.

IMG_0134

Here’s our birthday girl sporting her nametagged bag post party! I think she was pleased with how things went. Many thanks to the moms and dads who helped it be special!!!
IMG_0174

LinkWithin

Related Posts Plugin for WordPress, Blogger...